Even with the Best Shopify Page Builders at your disposal, a cluttered product page or a missing SKU can stop a sale in its tracks. Do your titles, product images, variants, inventory, and pricing tell a clear story, and does your product SEO help customers find you? This guide will show you how to add products to Shopify and optimize your listings with clear descriptions, tags, collections, CSV import tips, alt text, and shipping settings, so your pages convert effectively. PagePilot's AI page builder steps in to speed the work by generating polished product pages, resizing images, suggesting SEO friendly titles and meta descriptions, and prepping CSVs so you can add products faster and with fewer mistakes.
Understanding Shopify Product Listings
With over 4 million live eCommerce websites powered by Shopify, the platform serves businesses ranging from one-sku boutiques to enterprise catalogues. A product listing on Shopify is the unit that appears on your store and in search results. It defines what customers see, what the checkout receives, and how inventory and fulfilment behave.
What a Product Listing Includes: The Fields You Must Master
- Title: A clear, searchable product name that uses primary keywords.
- Description: A written product overview that covers features, benefits, specifications, and a call to action. Use short paragraphs and bullet points for scannability.
- Images and video: Multiple angles, lifestyle shots, and optional 3D or video files. Add alt text for accessibility and search engine optimization.
- Price, Compare at price, Cost per item: Set retail price and optional discounts and margins.
- SKU, Barcode (UPC/EAN), Vendor: Unique identifiers for stock control and third-party integrations.
- Inventory tracking: Quantity on hand, tracking method, and low stock alerts.
- Shipping settings: Weight, shipping profiles, and fulfilment service. Disable shipping for digital items.
- Variants: Option names (size, colour), prices, SKUs, and inventory per variant.
- Collections, Tags, Product type: Organisation tools used to group and filter products.
- SEO fields: Page title, meta description, and URL handle for search optimization.
- Product templates and metafields: Custom fields for extra data such as ingredients, care instructions, or downloadable files.
Physical and Digital Products: How Shopify Handles Both Smoothly
For physical goods, you configure weight, shipping profiles, and fulfillment options so that carriers can calculate rates at checkout. For digital goods, you:
- Turn off shipping
- Attach a downloadable file
- Use an app to deliver a link by email
Hybrid stores that sell both physical and digital items run smoothly from a single product catalogue and the same Products section in the admin.
Where Product Listings Are Managed: Inside Shopify Admin
Open Shopify admin, go to Products, and choose Add product to create a listing. Use the bulk editor to update prices, inventory, or tags across multiple items. For repeated setups, use product templates to prefill common values. You can also import and export product CSV files, or use apps to sync inventory from suppliers or marketplaces.
The Unlimited Listings Advantage: Add as Many Products as You Need
Shopify plans allow you to add unlimited product listings, making scaling your assortment simple. That freedom lets brands test new lines, seasonal ranges, and bundles without plan limits. Keep an eye on site performance and image optimisation as your catalogue grows to preserve page speed and conversion rates.
Variants and Collections: Limits That Shape Catalog Strategy
Each product supports up to 100 variants across up to three option names. Stores with more than 50,000 total variants can only add 1,000 new variants per day unless they are on Shopify Plus. You can create up to 5,000 collections. Plan variant structures and split huge products into separate SKUs when the number of options exceeds these thresholds.
Related Reading
- Does Shopify Host Websites
- Is It Worth Buying a Prebuilt Shopify Store
- How Much Does It Cost to Build a Shopify Website
- Shopify Product Page Customization
- What is Custom Liquid Shopify
- How to Customize a Shopify Website
- Shopify Speed Optimization
How to Add a Product to Shopify (Step-by-Step)

Click Add product at the top of the Products page, then type your product name in the Title box. Keep the title concise and readable, between 70 and 90 characters long, and include target keywords, as well as any unique features such as color, size, or material, to help with search and conversions. Ask yourself which phrase a buyer would type into Google, and use that phrase naturally in the title.
Write a Clear Product Description That Sells
In the Description box, add product details that answer buyer questions and reduce returns. Include the following:
- Product dimensions
- Shipping notes
- Price clarity
- Image lineup
Describe benefits and use cases in plain language so visitors can scan and decide fast. Utilize SEO phrases and natural keywords for search engine optimization while maintaining honest and user-focused copy.
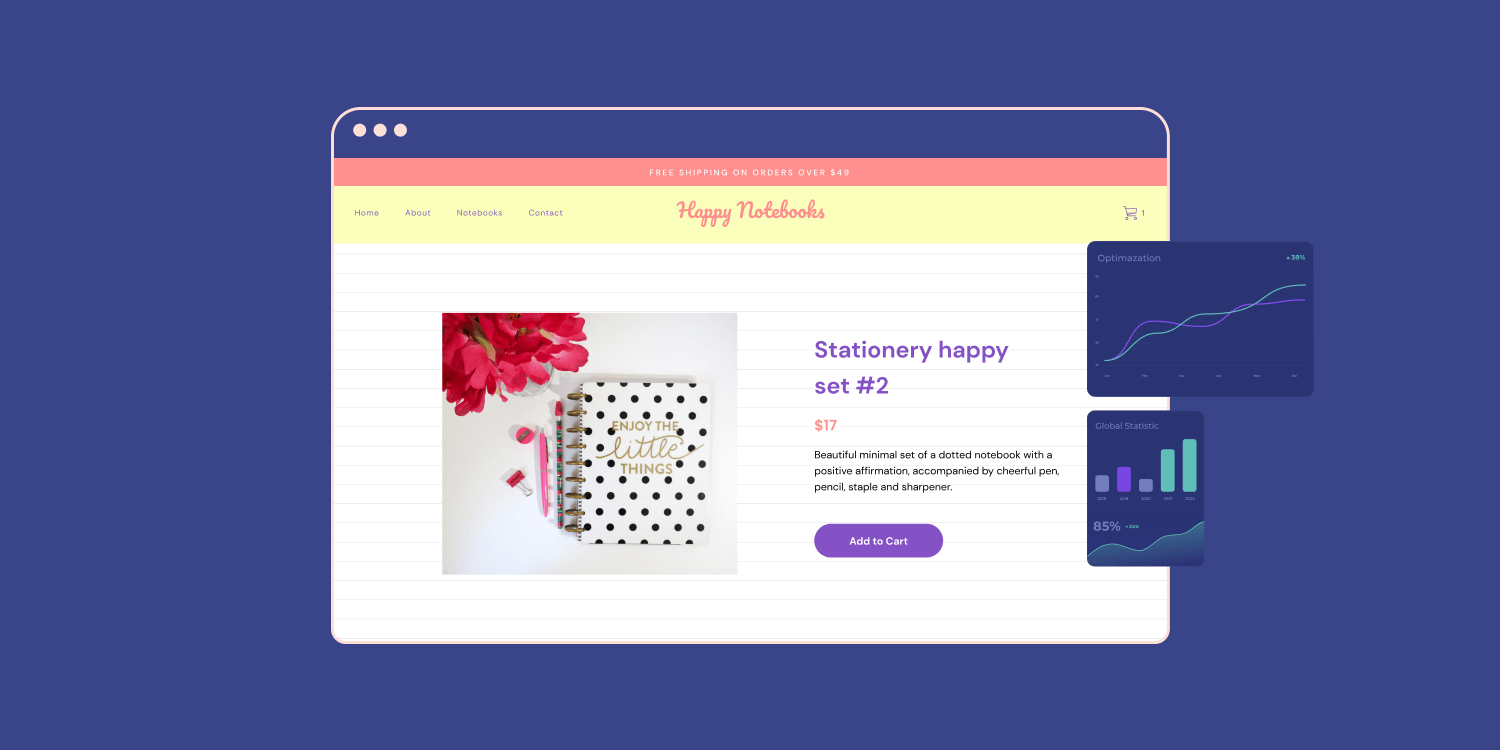
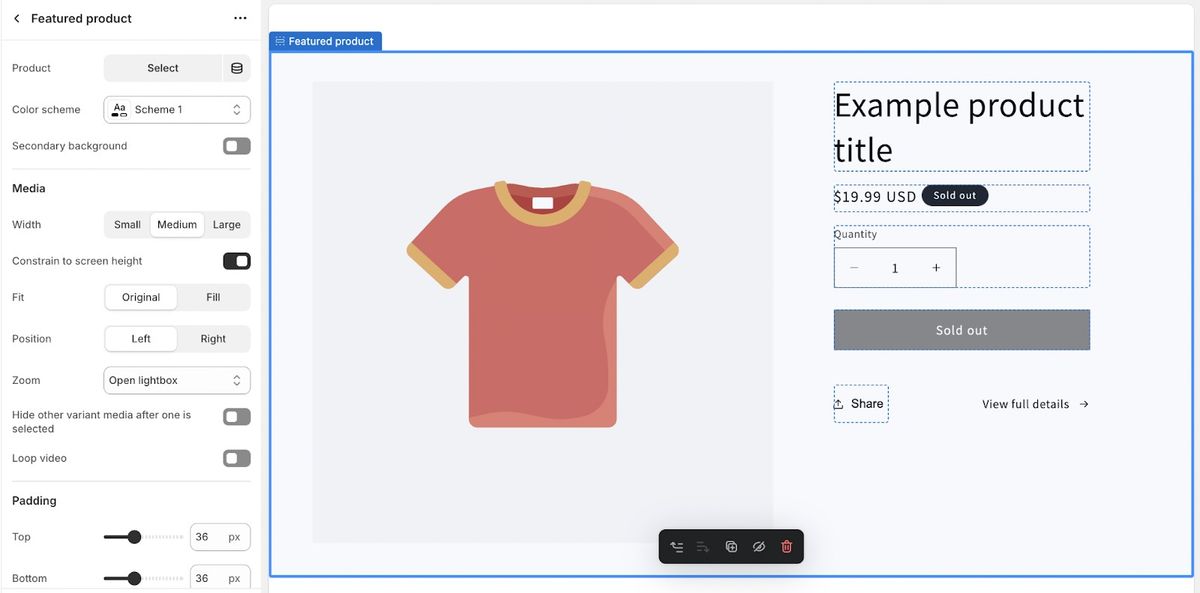
Add Media: Images, Video, and 3D Models
In the Media box, click Add file, then Add from URL, or drag and drop files. Shopify accepts up to 250 media items, including images, videos, and 3D models. The first item becomes the featured image for the product. After you save the product, click a picture and add alt text to explain the image for search engines and accessibility.
Set Pricing Fields and Tax Rules
Under Pricing, enter the Price customers pay. Then, compare the sale price (if the item is on sale) and the Cost per item to track margins. The store currency is set in General Settings. If the product is taxable, check Charge tax on this product so Shopify applies taxes correctly at checkout.
Manage Inventory and Quantity Controls
Use the Inventory section to assign stock to your location and select whether Shopify should track the quantity. Check the Track quantity to let Shopify lower stock when sales occur, set the Quantity you have, and enable 'Continue selling' if out of stock, allowing backorders when you want them. Add SKU and barcode numbers to match the supplier's or warehouse's systems. If you sell from multiple locations, adjust the Available counts per location.
Set Shipping Options and Product Weight
If you sell a physical item, verify that it is a physical product and enter the weight to determine shipping rates and label calculations. If you ship internationally, ensure that this product is eligible for international shipping and complete the Customs information fields that appear. For digital goods, select 'Digital product or service' so that no shipping rules apply.
Create Options and Variants for Size, Color, and More
Check if this product offers options such as size or color to add variants. Choose an Option name, such as Size or Color, and list Option values like Small, Medium, Large, or Red, Blue, Green. Add another option if you need material or style. Once variants appear, you can set the price, quantity, and SKU for each variant and assign an image to each for a clearer product page.
Edit the Search Engine Listing for Better Visibility
Under Search engine listing preview, click Edit website SEO to change the page title, meta description, and URL handle. Use relevant keywords in the page title and meta description, and keep the URL handle simple and aligned to the product title. Preview lengths to ensure titles and descriptions are not cut off in search results.
Publish the Product: Status, Save, and Sales Channels
Set Product status to Active to publish the product or leave it as Draft to return and edit later. Click "Manage" under "Sales channels and apps" to choose where the product appears after you connect those channels to Shopify. Save the product and verify it appears correctly on the chosen storefronts.
PagePilot CTA
PagePilot’s AI page builder will help you test product ideas and angles faster: give our AI a competitor or supplier URL, and it will create a high-converting product page using that site, plus upgrade visuals with our AI Product Image function so you do not compete on identical copy and photos. Start a FREE Trial and generate 3 product pages for free today (no credit card needed).
Related Reading
- Hire Someone to Build Shopify Store
- Shopify User Experience
- How to Design Shopify Website
- How to Create a New Page Template in Shopify
- How to Create a Landing Page on Shopify
- Shopify Mobile Optimization
- How to Add a Review Section on Shopify
7 Tips for Optimizing Product Listings for Conversion
1. Make Images Do the Selling
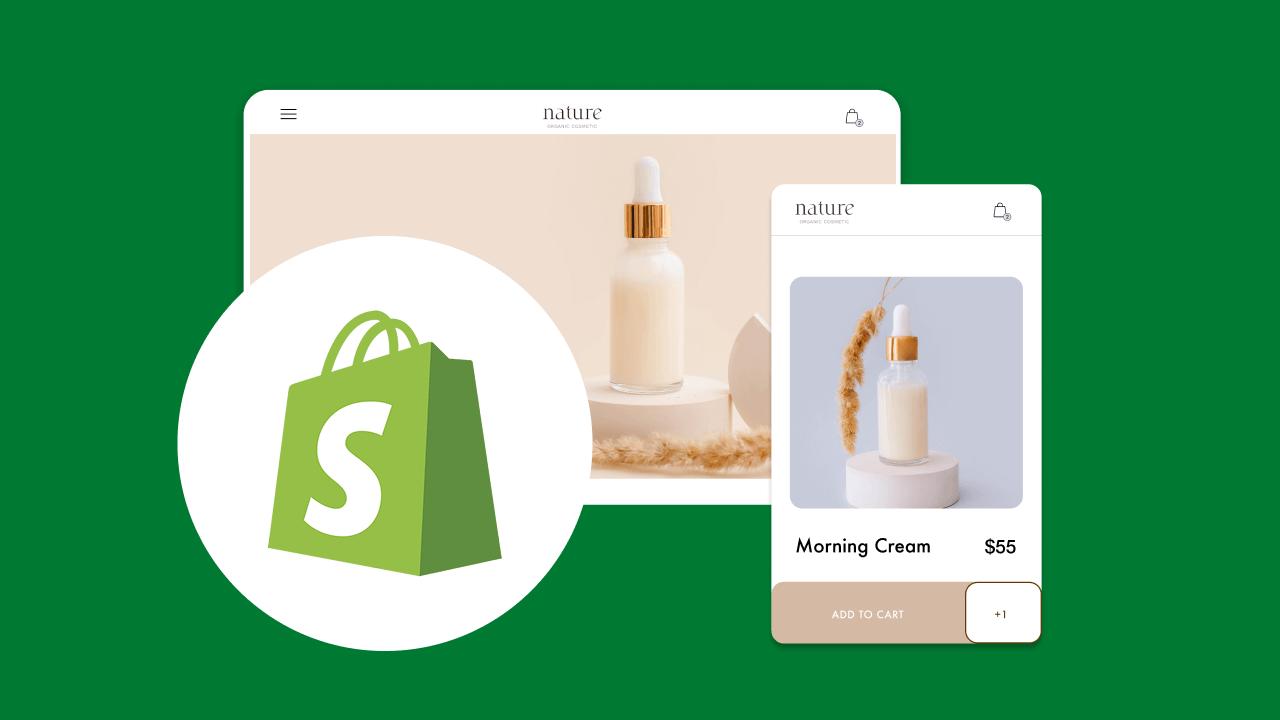
High-impact product images reduce doubt and increase clicks. Utilize professional product photography that effectively highlights what makes the product unique. White background shots make side-by-side comparisons easy for shoppers. Lifestyle or model photos provide context, helping buyers envision their use in everyday life. The choice of which to use will depend on the product page location, the brand's voice, and the shopper's intent.
Optimizing Shopify Product Images
When you add products to Shopify, upload multiple images and set a clear featured image. Follow each channel's sizing and format rules. Use descriptive file names that include the product name and add alt text for:
- Accessibility
- Image SEO
Consider modern web formats, such as WebP, if your theme supports them, and include zoom and 360-degree options when appropriate. Do you have the correct image sizes and file names ready for uploading your product?
2. Put the Right Keywords Where They Matter
Target keywords help shoppers find and click your product pages. Start with keyword research tools and cross-check search terms against your web analytics to see which phrases bring paying customers. Optimize product names, descriptions, and Shopify search engine listing fields with primary and long-tail keywords to enhance visibility. For Amazon sellers, add backend keywords in the product backend; on Shopify, use product tags, collections, and metafields to capture additional search signals.
Optimizing Titles and Descriptions for Search
Add primary keywords to product titles and long-tail variations to descriptions so listings align with search intent. Avoid keyword stuffing and keep phrasing natural. When you add products to Shopify, edit the search engine listing preview and meta description for each product. Which keywords are converting traffic to sales on your site right now?
3. Write Titles That Match Search Intent and Sell
The product title is a key element in establishing discovery and trust. Put the most relevant features up front: type, target user, core material or color, and size when those are important. If a brand name matters on third-party sites, include it. Highlight real differentiators in the title only when they add value. If one size fits all is unique for you, call it out; if it is standard, skip it.
Optimizing Titles and Categorization
When adding products to Shopify, use the vendor and product type fields to help collections and filters function properly. Keep titles concise, scannable, and distinct from competitors so shoppers recognize what they want at a glance. Which product title could you refine to match a high-intent search query?
4. Let Social Proof Do the Heavy Lifting
Ratings and reviews reduce purchase friction and increase conversion rates.
- Use a review app or Shopify product reviews to gather and show ratings on product pages.
- Automate post-purchase emails and review requests through your order confirmation flow or your email marketing platform.
- Offer an easy review path and respond to negative feedback promptly to show you stand behind your products.
- Display review snippets and star ratings on the product page and in structured data, allowing search engines and shopping feeds to display rich results.
Do you have an automated review request sequence set up for new orders?
5. Test Like a Scientist and Iterate
Listing optimization improves with controlled tests. Change a single variable at a time, such as image style, title wording, or price, and run the test for a sufficient amount of time to gather a statistically significant signal. Utilize Shopify analytics, UTM-tagged traffic, and conversion tracking to measure click-through rates and purchase rates accurately.
Structured A/B Testing Setup
If you are on Shopify Plus, use built-in experiments; otherwise, use reputable A/B test apps. Record the test hypothesis, the metric you will measure, and the timeframe before you start. Two weeks usually yields early insight, but let the data decide when to stop. Which listing element will you test first to lift conversion?
6. Make Promotions Clear and Strategic
Price is often the deciding factor on comparison sites. When adding products to Shopify, use the 'Compare at price' field to automatically display the discount and show sale badges on the product card. Create automatic discounts, coupon codes, and bundled offers without changing the product data permanently. Highlight time-limited promotions, free shipping thresholds, and quantity discounts to increase AOV.
Maintain competitive promotions without compromising perceived quality. Update your structured data to include the sale price, so that search engines and feeds accurately reflect the offer. What promotion could you add to a slow-moving product to increase demand?
7. Add Structured Data So Search Engines Read Your Page
Structured data tells search engines what your product actually is. Implement Google Product structured data with JSON-LD to include name, price, availability, SKU, GTIN or barcode, color, size variants, and review score. Offer and discount schema help search engines show sale prices in shopping results. Shopify themes like Dawn include basic product schema, and you can extend that with metafields or schema apps when you add products to Shopify.
Validating and Enriching Structured Data
Test your markup in the Rich Results Test or Structured Data Testing Tool and ensure the product page outputs valid JSON-LD. The more accurate attributes you provide, the more likely search engines and comparison engines will display rich snippets for your product pages. Which product pages require richer schema and accurate variant data at this time?
Managing Products in Bulk on Shopify

Select multiple products from Products > All products, then click Edit to open Shopify's Bulk Editor. Add the fields you need—price, SKU, inventory, tags, vendor, weight, and metafields—so you can change many attributes in a spreadsheet-like view. Want to update prices across hundreds of SKUs? Use filters to narrow the set, change cells directly, then save.
CSV Preparation for Large Product Imports
For large imports or migrations, use the product CSV. Export your current products first so you have Shopify's product CSV template. Populate columns such as:
- Handle
- Title
- Body HTML
- Vendor
- Product Type
- Tags
- Published
- Option1 Name
- Option1 Value
- Variant SKU
- Variant Inventory Qty
- Variant Price
- Image Src
- Metafield columns
Safe Image Hosting and Import Strategy
Host images on a public URL or include their paths in the Src attribute of the Image element. Test with a small CSV slice before importing the whole catalog, and keep a backup export in case you need to roll back. If a file exceeds Shopify limits, split it into smaller CSVs and import sequentially.
Clone and Modify: Duplicating Existing Products to Save Time
Open a product, select More actions, and then choose Duplicate. The new product copies:
- Title
- Description
- Variants
- Images
- Settings
This speeds listing when items share attributes like sizes or colorways. After duplication, update the product title, handle, SKU values, and image order to avoid conflicts and to keep search-friendly product URLs.
Managing SKUs After Product Cloning
Watch SKUs and inventory after cloning. Duplicate SKUs can cause confusion in order routing and inventory reporting. If you intentionally keep the same SKU, mark the item as a variant of an existing product, or manage inventory locations carefully to ensure stock counts remain accurate.
Power Tools: Third-Party Apps for Faster Bulk Uploads and Syncs
Do you need rules, scheduled edits, or formula updates? Third-party apps add features that Shopify’s native editor lacks. Look for apps that support:
- CSV import from suppliers
- FTP or Google Sheets sync
- Advanced filtering
- Undo history
Good apps let you map incoming columns to Shopify fields, push images in bulk, and transform data during import so you do less manual cleanup.
Multi-Channel Inventory Management
Use apps that provide two-way inventory sync if you sell across channels or marketplaces. That prevents overselling and maintains consistent variant-level inventory. Additionally, select apps that offer clear rollback options and activity logs, allowing you to track changes and revert any mistakes.
Pro Apps: Best Picks for Bulk Product Management and Editing
The Bulk Product Editor and Excel-like Bulk Product Manager replicate spreadsheet workflows with added functionality. They allow you to perform mass price updates using percentages, conditional rules, and find and replace across titles and descriptions. They also often support:
- Bulk image uploads
- Variant splitting or merging
- Scheduled tasks
Look for:
- Bulk edit features with filters and smart rules
- CSV import and export that follow Shopify’s template
- Variant and SKU management tools
- Inventory sync across locations and channels
- Undo and audit logs for safe operations
Try a free trial on a few hundred SKUs to confirm performance and to measure how the app handles images and metafields before committing.
Upsell Smartly: Creating Product Sets and Bundles the Right Way
Do you want to sell bundles as a single SKU or keep component tracking? Two common approaches exist. Create a single product that represents the bundle and manage its own inventory. Alternatively, use a bundle app that deducts stock from component SKUs when the bundle is sold, ensuring accurate inventory levels.
App Features for Custom Bundles
Bundle Builder and Bold Bundles enable customers to create custom kits and apply rules that change the price or availability of options. They support conditional logic, live inventory checks, and mixed bundle types such as fixed kits or pick-your-own bundles. Choose an approach based on how you want reports to show sales:
- Single-line item for simpler accounting.
- Line-item decomposition for per-SKU margins and reordering.
Best practices for bundles:
- Maintain clear product descriptions
- Display component counts
- Synchronize inventory at checkout
- Test how returns will be handled within your order flow
Practical Tips and Checklist for Bulk Product Workflows
Export before you edit. Test on a subset. Keep consistent SKU and handle conventions. Use tags, vendor, and product type to filter lists quickly. Store images on a reliable hosting service and reference their URLs in CSV files. Apply metafields for extra SEO or detailed specs and use automated collections to group bulk updates for promotions.Need help setting up a workflow or selecting an app that suits your catalog size and sales channels? Which part of the bulk process would you like to improve first: import speed, price updates, or inventory sync?
Start a FREE Trial and Generate 3 Product Pages with Our AI Page Builder Today
PagePilot reads a competitor or supplier URL and builds a ready product page you can use in your Shopify admin. The AI extracts product title, key features, specs, pricing cues, and social proof, then recomposes headline, short description, and long product description optimized for conversion and SEO title and meta description—no manual copy-paste.
Streamlining Product Addition and SEO
Use the generated page to add products to Shopify quickly—edit the product handle, slug, and SEO fields in the Shopify product editor, or export via CSV for bulk upload if you prefer. Want to keep ownership of the idea while avoiding duplicate content? PagePilot rewrites copy to ensure your product description and page content stand out.
Upgrade Product Visuals with Smart AI Image Editing
PagePilot’s AI Product Image function replaces or enhances supplier photos, so you don't compete with the same product images. It creates clean, white backgrounds, lifestyle mockups, and multiple aspect ratios for thumbnails and hero images, as well as compressed, web-friendly files that meet Shopify's recommended image sizes. The tool also writes image alt text and suggests focal crops for mobile and theme preview. Upload the processed images to Shopify product media, set the featured image, and add alt text to improve product image SEO and accessibility.
Speed Test Products and Angles Like an Experimenter
Create multiple page variants for the same SKU to test pricing, headlines, hero images, and buy flow. PagePilot produces page variants ready to publish as draft products or export to CSV for bulk import. You can set different product variants, option names, and variant SKU assignments before pushing to your store. Want rapid A/B tests on product pages, pricing, and collections? Build multiple versions, publish some to a sales channel, and track performance in your analytics.
Fit PagePilot into Your How to Add Products to Shopify Workflow
Start with the supplier or competitor URL, generate the page, then open Shopify admin > Products > Add product to import or paste content. Edit the title, add the product type, vendor, and set tags and collections so that the product appears in automated or manual collections. Configure variants with:
- SKU
- Barcode
- Weight
- Inventory tracking
Set pricing, compare at price, and upload the AI-optimized images to product media. Set shipping settings and fulfillment service, choose sales channels and product availability, and then save as a draft or publish to the online store.
Handle Bulk Imports, CSVs, and Templates Without Headaches
If you add products to Shopify at scale, export PagePilot pages to a CSV formatted to Shopify’s product import template. Map columns for title, body HTML, vendor, type, tags, published, option names and values, variant SKUs, variant prices, inventory quantity, weight, and image URLs. Use the Shopify admin import to bring all pages in as draft products for review. PagePilot also supports templates, so recurring fields like shipping settings and metafields get applied consistently across product uploads.
Reduce Duplicate Images and Copy While Managing Inventory
Dropshipping or reselling? PagePilot helps you avoid duplicate visuals and reuse supplier specs to create unique product descriptions and meta tags. Add inventory levels and track inventory policy per variant inside Shopify. Use the SKU and barcode fields to tie products to fulfillment partners or third-party logistics providers. The AI output includes structured bullets and spec tables that make the product page scannable and increase add-to-cart rates without creating duplicate content issues.
Export, Publish, and Iterate Quickly
Export pages as Shopify-ready drafts, or push directly to your store via app integration where available. Edit any field in the Shopify product editor: change handle, adjust SEO title and meta description, set product availability per sales channel, and schedule releases if needed. Want to iterate after launch? Duplicate the product in Shopify, tweak the headline, swap images, and test a new price point.